
L, XL, and XXL-Lines Moss Pole Pot-up Instructions
Pot-up Video:
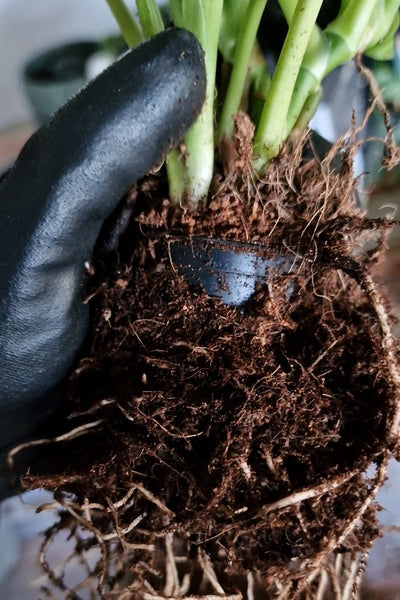
Plant Preparation:
- You don't know where it has been, and it may have pests such as fungus gnats nesting in it.
- The soil usually employed by nurseries is too dense for most climbing plants, and with the added extra moisture from the moss pole, it is bound to become waterlogged.
- It may be either "dead" soil, with no nutrients, or have too much fertilizer, which can burn your leaves.
- You may find a nasty surprise, the slowly choking nursery net or pot:

Prepare your soil:

- Peat-free compost/coco coir blend - contains nutrients and holds moisture
- Seaweed fertiliser - contains nutrients to get your plant growing right away
- Bark - aeration and movement (important for big roots)
- Pumice stone, loads of it! - holds the oxygen that your roots need, helps drainage (it is also a heavy element, helping to anchor your moss pole)
- LECA clay balls - more drainage!
- Charcoal - soaks up excess water, and is the "cleaner" of the substrate
- Coconut husk - holds moisture
Anchoring and stability:
You're ready to get started on the moss pole itself, firstly with the choice between using the anchor base, or the screw stake.
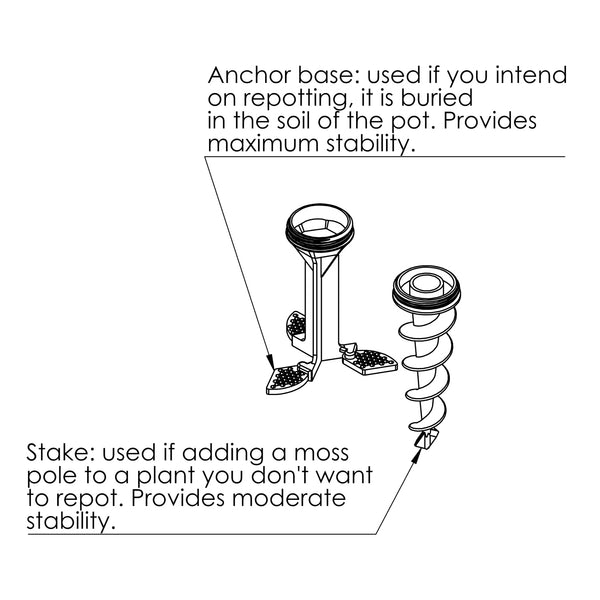
The anchor base is the most stable option, and with a few zip ties, you can fasten the base to your nursery pot to ensure there are no accidental depottings during its lifetime. The swivel wings will rotate to adapt to the diameter and position of the moss pole in your nursery pot.

Fill your first section with moss:
It can then be teased into the first section of your cylindrical moss pole, using a long stick to help you distribute the moss evenly throughout it.

Attach your prepared plant to the moss pole:
Certain plants will have a "front" and a "back" visible on the stem, with the leaves and petioles growing from the "front", and the aerial roots growing out of the "back". This is clearly visible with many Monstera varieties, and you will want to attach the stem to the first section with the roots in contact with the moist moss.

Use a little green tape (soft velcro-like material that can be found at many plant shops) to attach the stem to the moss pole. This tape can be removed once the plant has rooted into the moss, which will happen very quickly if the moss is kept moist.

Screw the first section into the anchor base:
You should be able to gently screw the moss pole section into the nursery pot now, if you have selected to zip tie the base to the pot. If you skip the zip ties, screw the base onto the section, and place it standing in the nursery pot in the position you'd like the pole to take while you fill the pot with your prepared substrate mix.
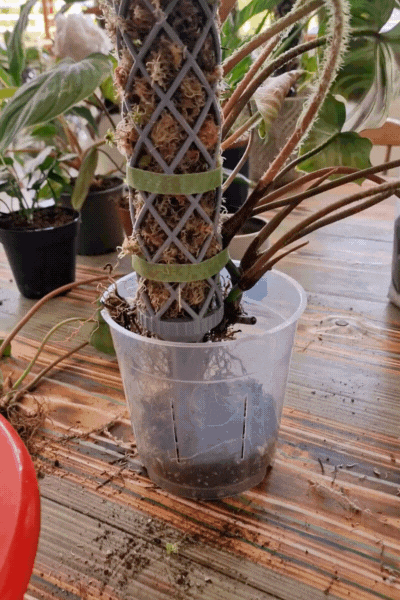
Fill with substrate:
The nursery pot can now be filled with your chunky mix, shaking the pot to ensure all the gaps between the roots are filled with soil.
Give your moss and soil a good water, allowing the soil to drain completely, particularly if it is going to be placed into a decorative planter that does have any drainage holes.
Extend and grow!
You can now fill and screw in however many sections you need to attach the full length of the stem of your growing plant, plus some length for future growth. I like to add an extra empty section above what is needed by the new growth, to make sure I don't need to add another section too soon.